A leaking refrigerator is not just annoying—it can also cause slippery floors, water damage, and even raise your electricity bill if left unchecked. Before you start worrying about expensive repairs or replacing your appliance altogether, take a breath. Many fridge leaks are surprisingly easy to fix at home with just a little troubleshooting.
Step 1: Identify the Source of the Leak
First things first—where is the water coming from? Sometimes, what looks like a big problem is actually just condensation or a minor spill. Check if the leak is at the front, back, or underneath the fridge. If you see water pooling underneath, pull the refrigerator away from the wall (carefully!) and check for any obvious signs of trouble.
Step 2: Check the Defrost Drain

One of the most common reasons for fridge leaks is a blocked defrost drain. Over time, food particles or ice can clog the drain hole, causing water to back up and leak onto your kitchen floor. Locate the drain hole (usually at the back or bottom of the main compartment), and gently clear any debris with a pipe cleaner or warm water. Sometimes, a simple flush is all it takes to solve the problem.
Step 3: Inspect the Water Supply Line

If you have an ice maker or water dispenser, your fridge is hooked up to a water supply line. Any kinks, cracks, or loose connections in this line can cause leaks. Check the hose for signs of wear or leaks, and tighten any loose fittings. If the line looks damaged, you might need to replace it—fortunately, these are usually inexpensive and easy to install.
Step 4: Examine the Door Seals

Believe it or not, a broken or dirty door gasket (the rubber seal around your fridge door) can allow warm air in, leading to excess condensation and water pooling inside or outside the unit. Wipe down the seals with warm, soapy water and inspect for cracks or damage. If the seal isn’t tight, consider replacing it—a relatively simple fix that can save you from future leaks.
Step 5: Make Sure the Fridge Is Level
A refrigerator that’s not sitting level can sometimes cause water to flow where it shouldn’t, especially during the defrost cycle. Place a bubble level on top of the fridge and adjust the feet or wheels as needed until it sits evenly.
Step 6: Empty and Clean the Drain Pan
Most fridges have a drain pan underneath that catches excess water. If it gets too full, cracked, or dirty, you might notice a puddle beneath your appliance. Carefully remove the pan (consult your user manual if you’re unsure how), empty any water, and give it a thorough cleaning before replacing it.
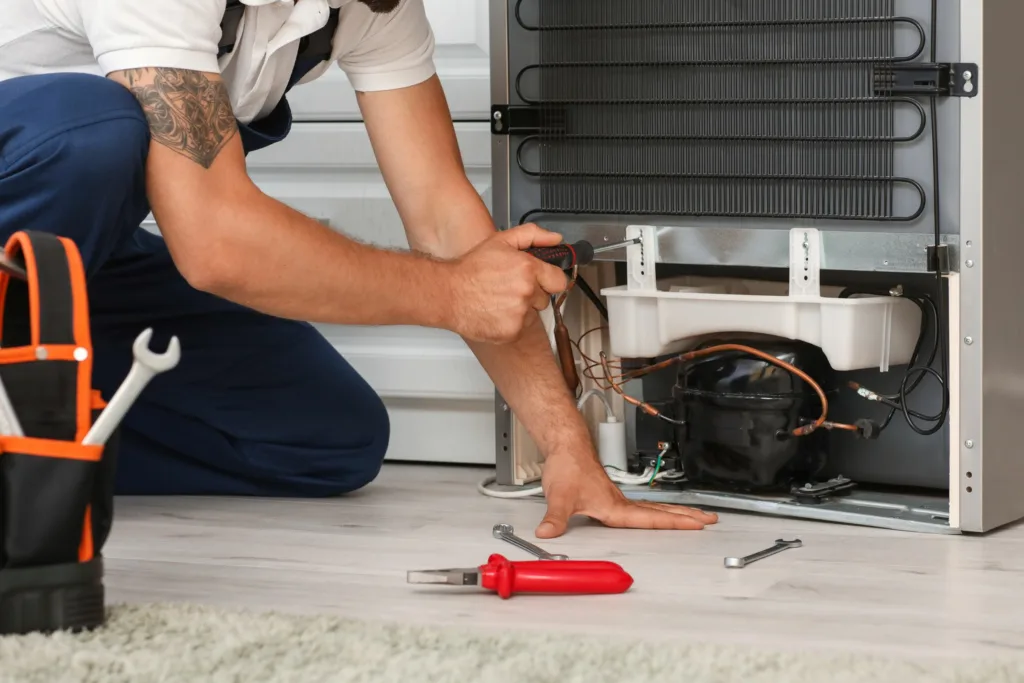
When to Call a Professional
While many fridge leaks can be handled with some DIY effort, there are times when it’s better to leave it to the pros. If you’ve tried all the above steps and your refrigerator is still leaking, or if you notice water dripping from inside the fridge walls, it might signal a more serious mechanical issue. A certified appliance repair technician can diagnose and fix complex problems safely.
Prevention Tips for the Future
To keep leaks at bay, make it a habit to clean your fridge regularly, check seals and hoses, and ensure it’s always level. A little preventative maintenance goes a long way toward saving you time, money, and headaches.
Conclusion
A leaking refrigerator can be a hassle, but it’s not the end of the world. By taking a methodical approach—checking drains, hoses, seals, and pans—you can often find and fix the source of the leak yourself. Of course, when in doubt, never hesitate to reach out to a professional. After all, a working fridge is one of those modern comforts we’d all rather not live without.